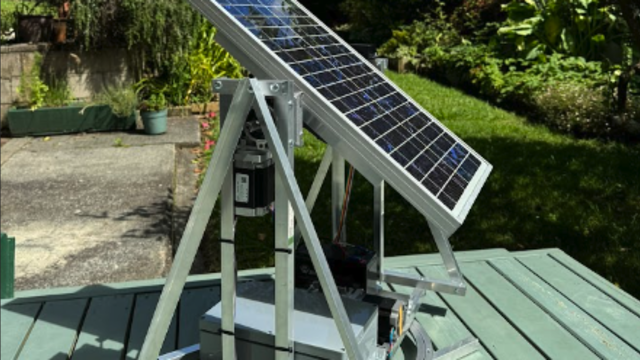
The shelf itself will be made of Lego (mainly Lego Technic), and will be large enough to display a medium-sized Lego model, around 30 cm wide by 15 cm deep. The non-Lego parts which we are making will be the wall mounts – these will be 3D-printed (although you could certainly make them in other ways). We will make two identical mounts, allowing us to securely attach the shelf to the wall without harming any Lego pieces.
Before we start designing, we need to know how to make our mounts compatible with Lego pieces. There are a few ways that Lego pieces can be attached to each other: the iconic standard bricks have studs on the top which click tightly into corresponding spaces underneath, while Lego Technic pieces are often joined using pegs and axles which go through holes. The sizing and positioning of these studs and holes are standard across all Lego pieces, and there is plenty of information on the web about this system. Essentially, the standard unit in these bricks is 1.6 mm, and most things are some multiple of that.

The studs on official Lego pieces are made with really precise tolerances (less than 0.01 mm!), which is why they fit together so nicely, but it does make it hard to make your own versions. Instead, we’re going to use the Lego Technic peg/hole system, because it’s a bit more forgiving (especially if you’re not using CAD).
We’re going to use FreeCAD to design our mounts because it’s free and open-source – you can download it from freecadweb.org. FreeCAD consists of a number of different 'workbenches', which you can switch between using the drop-down menu at the top of the screen. We want to start in the 'Part' workbench, and we’re going to begin by adding a 'cube solid', which will form the main body of our part. Next, set the length, width, and height of the solid. In brick terms, our part is going to start off as the size of two classic bricks end to end: two studs wide (ten units), eight studs long (40 units) and six units deep. This works out to 64 mm by 16 mm by 9.6 mm.

If you haven’t used FreeCAD before, you may want to experiment a bit before pushing on with this design – try and get the hang of zooming, panning, and rotating the camera. Then try creating, moving, and resizing a few different shapes. You will also want to learn about 'cuts' between different shapes, which is where you subtract one shape from another – this is done by selecting two shapes, then clicking the Make a cut of two shapes button. The second shape you select will be removed from the first.
Use this subtraction technique to add holes to your part, using cylinder shapes with a diameter of three units. We are essentially creating a modified Lego Technic beam, where the centre of each hole’s vertical position is 3.5 units from the bottom, or 2.5 units from the top. Horizontally, the holes are at multiples of five units from either end. If this is unclear, carefully measure a Lego Technic beam, noting that pretty much every measurement is a multiple (or occasionally a half-multiple) of the unit,1.6 mm.

Next, we want to add pilot holes for our screws (more cylinders), as well as countersinks for the screw heads, which are made using cone shapes. Measure your screws to determine the dimensions of the cone and cylinder objects. You may find it easier to create all the shapes you want to subtract, then fuse them together using the Union button, before subtracting them as one from the original basic cube solid.
So far, our piece pretty much matches the dimensions of standard Technic beams, but there are now a few modifications to make. First, we need the holes to be a little further from the wall (this will allow us to use angled pieces when building the shelf), so add another two Lego units (3.2 mm) to the bottom of the main cube solid. Second, you will need to reduce the size of the cube solid by at least 0.1 mm on the left, right, front, and back (i.e. 0.2 mm less width and depth) so that the fit is not too tight (Lego also do this).
Export your model as an STL file and print it. Once you’ve successfully printed one mount, check to see that it fits well with a Lego Technic piece. Try putting an axle or a peg in the hole, then modify or reprint the part if necessary. Once you’re happy, print the other matching part.

Next, we need to secure the mounts to the wall. Use a spirit level to check that each piece is properly aligned, both relative to itself and the other piece. If you want to be really accurate, you can build both mounts into a simple temporary Lego model to help get the spacing exactly right. If this is your first time mounting something to a wall, take your time! Our example is mounted on wood in a workshop, which only requires wood screws, but if you’re doing this in a house, make sure you don’t drill through an electrical cable, and use the appropriate wall plugs and matching screws.


With your mounts in place, you can build your shelf. We’re not going to give you instructions for this part, because half the fun of Lego is figuring out the design. Bear in mind that the shelf will have to be fairly strong in order to support a model, particularly at the furthest point from the wall. Long Technic beams are good for adding rigidity (see the section about angled pieces), while flat 'plate' pieces are useful as the top surface, but don’t feel you have to cover the entire top surface unless you want to – the main thing is that your shelf has enough structural integrity not to bend once you place a model on it. Add a few decorative pieces to finish, and you’re done!
Wood or metal?
Even if you don’t have a 3D printer, this project is perfectly possible using more traditional tools. For example, you could mark a piece of wood or metal using a Lego Technic beam’s holes as a template, then use a pillar drill to make nice straight holes in the material. Note that a standard Technic beam is 8 mm wide (and a standard Lego brick 16 mm wide), so if you can make your design out of something which is already some multiple of this measurement (e.g. 8 mm stripwood), it will make your life easier!
Lego power
Besides making your own parts which attach directly to proper Lego bricks, there are various other ways to make something compatible with Lego, particularly Lego Technic. Rubber bands and string are often used in Technic models as miniature equivalents of real-life drive belts and steel cables. Using these items can allow a non-Lego motor to drive a Lego mechanism, providing a bridge from Arduino and Raspberry Pi circuits into the world of Lego.
You can even go one stage further and interact directly with Lego’s electric system. There is plenty of information on the web about different Lego motors, such as their required voltage, current draw, etc. There is also a kit called BrickPi which connects a Raspberry Pi to Lego Mindstorms sensors and motors.
And if you’re really ambitious, the inner diameter of Lego pneumatic tube is 1.5 mm…
Strong builds A good way to strengthen your Lego builds is by using Technic beams at an angle. One of the most straightforward ways to do this is with 3:4:5 triangles, i.e. right-angle triangles which have a length of exactly three units on one side, four on another side, and five on the hypotenuse. In the case of Lego, this unit could be the distance between two holes (or studs). You can then scale this up, so a 6:8:10 triangle would also work, and is a good fit for Lego Technic because there are beams with seven holes, nine holes, and eleven holes (note that you need one extra hole for each side because the first one is effectively at zero).